How to install the PrivateEyePi sketch on ESP32 development board to interface to PrivateEyePi
What you will need
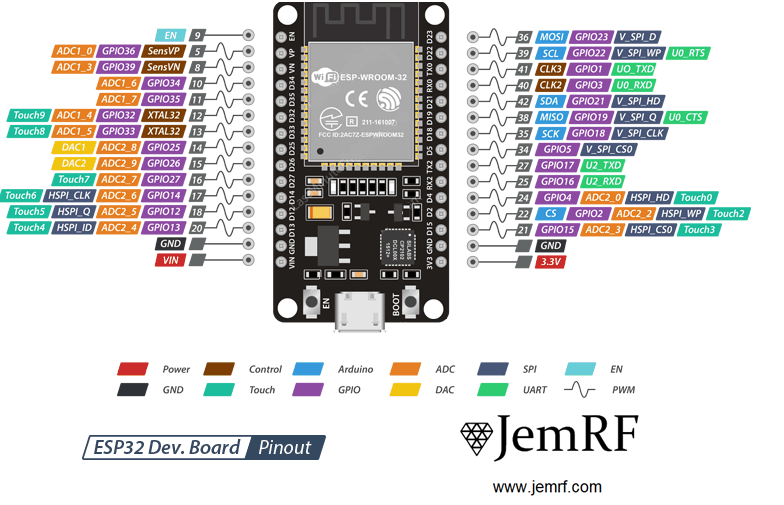
- ESP32 Development board. There are many variants available but if you intend connecting JemRF sensors then make sure GPIO pins 16 (TX2) and 17 (RX2) (Serial Port 2) are exposed. The ESP32 has two hardware serial ports and we will be using Serial Port 2 to connect the Flex RF module, so that you can use Serial Port 1 for debugging.
- Micro USB to USB 2.0 connector to connect the ESP32 to a PC
- A PC is required to load firmware on the ESP32. We will be using the Arduino IDE that has client available for
Windows, Mac or Linux.
What you need to know
- General computer user knowledge
Step 1 - Install and configure the Arduino Integrated Development Environment
- Visit the Arduino site and download and install the software. Follow their guide for installation. Its quite easy to install - next, next, finish etc.. They also have a very well documented getting started guide that will help you if required. Note that the Arduino IDE is primarily designed for their Arduino ATMega platforms but they also support a number of other development boards, including ESP32.
Note: We chose the Arduino development environment primarily for this tutorial because of its ease of use, but you can also program the ESP32 on Lua or Micro-Python, but we have not provided the software or instructions for those platforms.
- In the Arduino IDE go to File->Preferences and enter:
https://raw.githubusercontent.com/espressif/arduino-esp32/gh-pages/package_esp32_index.json
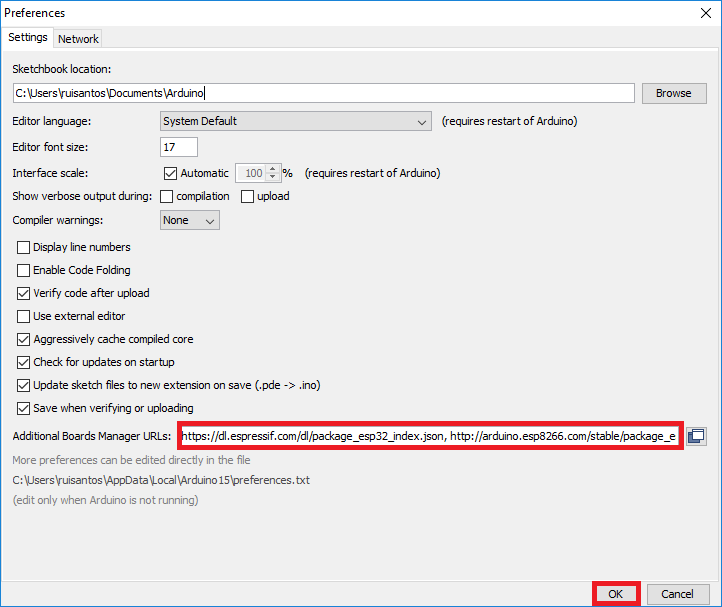
Note: If you already have other preferences in the input box then you can separate the URLs with a comma.
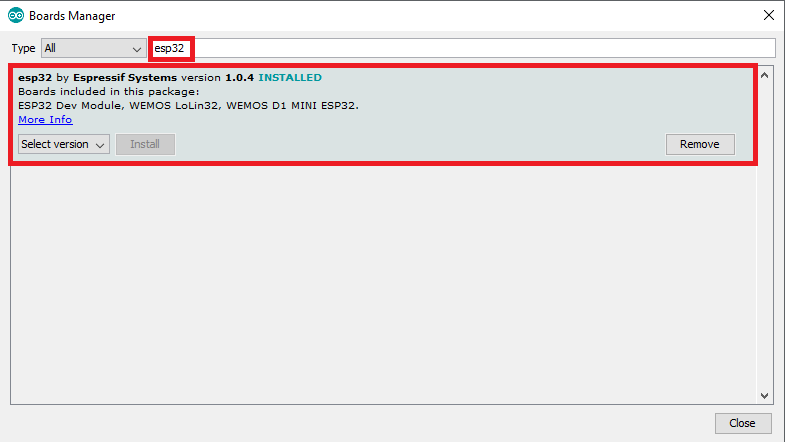
- Open the Boards Manager and select the
ESP32 Dev ModuleTools->Boards->Boards Manager… and click Install
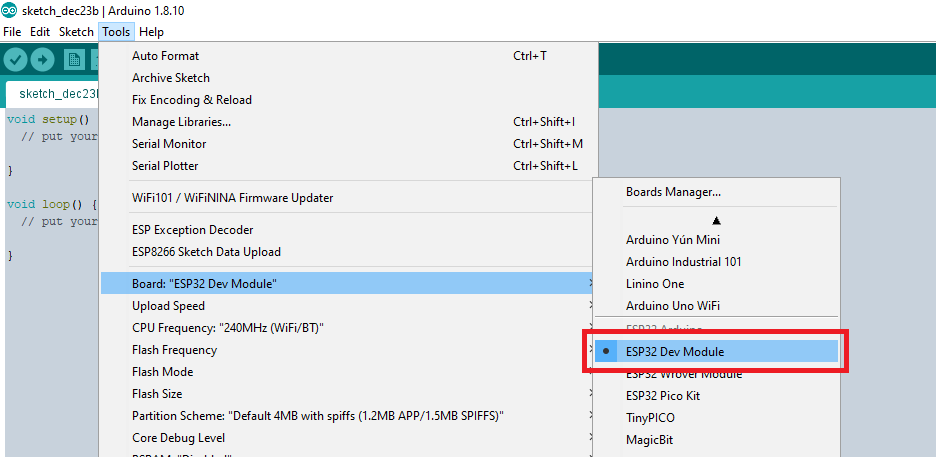
- Select the board Tools->Board->ESP32 Dev Module
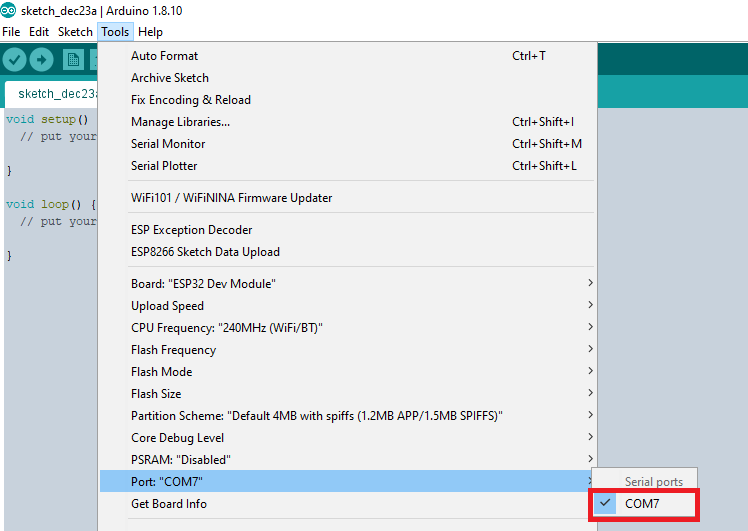
- Connect the ESP32 to the PC using the USB cable then select the port Tools->Port and then select the COM port from the list.
Note: The COM port number will vary. I am using COM port 7 but your will likely be a different number.
Thats it! Now you are ready to download firmware and load it on the ESP32 Development Board.
Step 2 - Download the JemRF Arduino software
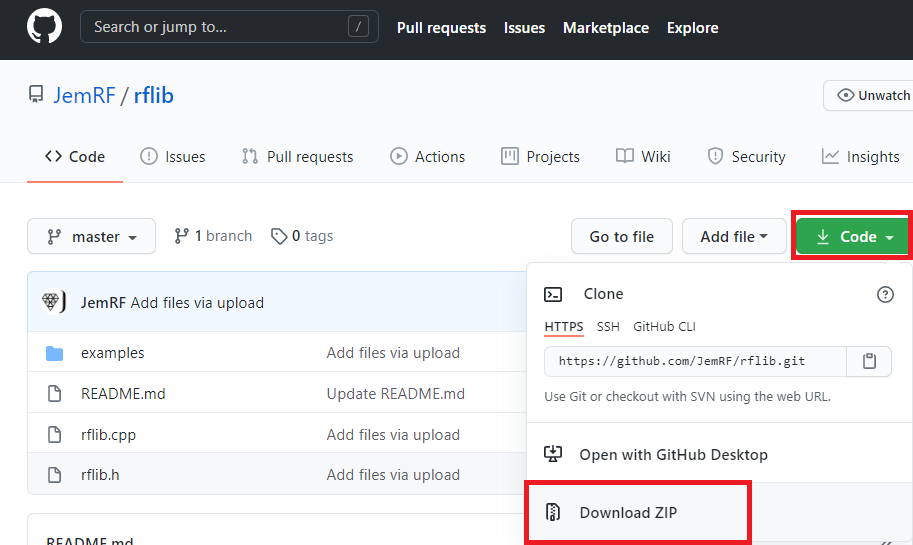
- Download the library from here: https://github.com/JemRF/rflib.git
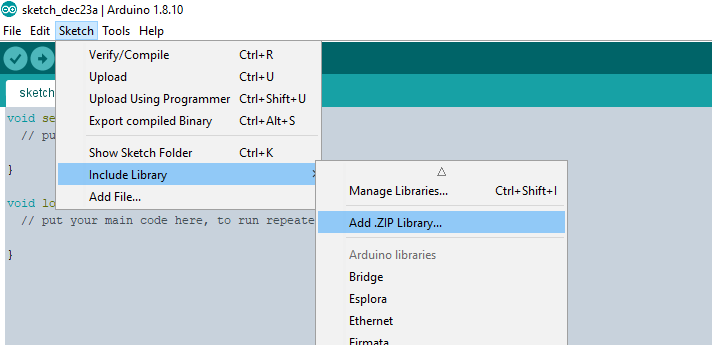
- Open up the Arduino IDE and click on Sketch->Include Library->Add .ZIP library and select the library downloaded in the previous step
- Close all instances of the Arduino IDE and restart the IDE