Google Cloud IoT is a fully managed service designed specifically to allow you to publish telemetry data in a very secure manner to the Google Cloud so that the data can be used by downstream services like Cloud Dataflow, Cloud Bigtable, Big Query, Cloud Datalab, Data Studio and Analytics.
In this tutorial we will provide you with step-by-step instructions to connect our RF sensors with Google Cloud IoT, but we will not provide details on how to use downstream products from Google Cloud. Google is continuously updating their services and documentation which can be found here.
Install Google GDK on Raspberry Pi.
In this tutorial we will install Google GDK on the same Raspberry Pi where you have installed a IoT Gateway.
Make sure you have the full version of Raspberry Pi Raspbian distro installed (not the light version), because Google Cloud IoT needs JavaScript (which is not installed on the light version).
Follow the steps described in Google’s IoT quick setup guide all the way down to where they describe the cloudiot_mqtt_example_nodejs.js example. Our code is based on this example so once you have it working then progress to the next section.
Interfacing RF Sensors with Google Cloud IoT Core.
Our Google Cloud IoT interface examples can be found at:
(https://github.com/JemRF/GoogleCloudIoT)[https://github.com/JemRF/GoogleCloudIoT]
Raspberry Pi Node.js Tutorial
What you will need
- Any model Raspberry Pi with preferably the full Raspbian distro
- IoT Gateway for Raspberry Pi or Flex RF Module
- Any wireless sensor
What you need to know beforehand
- How to operate a Raspberry Pi
- You have already set up your IoT Gateway and tested your sensor
- Some Python programming knowledge is preferable but not mandatory as we provide you with the source code
Open up a terminal session on your Raspberry Pi and download the JemRF Google Cloud IoT library from Github:
git clone https://github.com/JemRF/GoogleCloudIoT

cd GoogleCloudIoT
Since this is a Node.js tutorial we will be using the SerialPort library. Install this by typing:
npm install serialport
This example (rf2gciot.js) will publish telemetry data from your RF sensors to the registry (my-registry) and device (my-device) created in the Quick Start tutorial above.
Run rf2gciot.js as follows, replacing [PROJECT_ID] with your project ID:
node rf2gciot.js \
--projectId=[PROJECT_ID] \
--registryId=my-registry \
--deviceId=my-device \
--privateKeyFile=rsa_private.pem \
--algorithm=RS256
If it is working you will see wireless LLAP messages being converted to JSON and printed to the screen:
pi@raspberrypi:~/gciot $ node rf2gciot.js \
> --projectId=[PROJECT_ID] \
> --registryId=my-registry \
> --deviceId=my-device \
> --privateKeyFile=rsa_private.pem \
> --algorithm=RS256

Google Cloud IoT Core MQTT example.
connect
61AWAKE----
{'61AWAKE':}

61TMPA18.77
{'61TMP':18.77}

61SLEEPING-
{'61SLEEPING':}
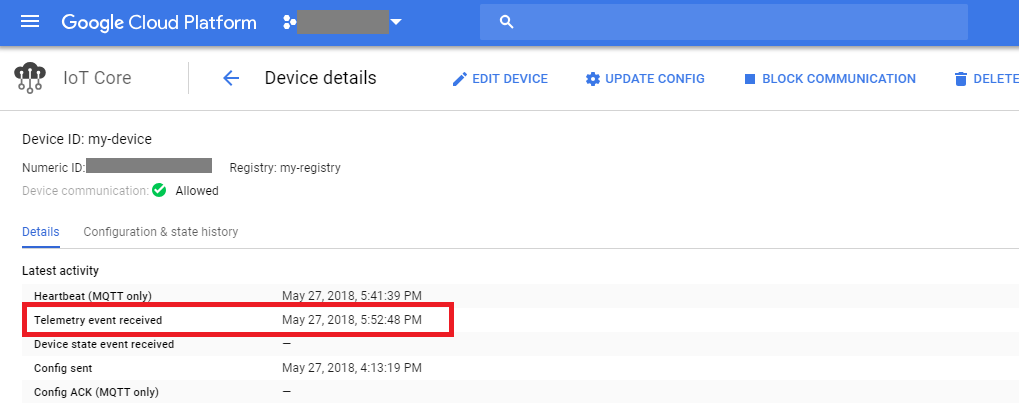
Now navigate to Google IOT Core, select your registry, then select you device and verify that the telemetry data is being received as shown below:
That’s as far as we will go in this tutorial. You are now ready to use the wireless telemetry data in the Google Cloud.